5 Tips for Printing Printables So They Look Fantastic!!
I've downloaded a printable, now what?...
I thought I would share a few tips on how to print art downloadable printables so that they look fantastic in your home. After you figure out the first step, which is how to download the file(s), the next step is how to print art printables.....
How to print art
I'm sure you've already noticed that the colors on your screen look different than what comes out of your printer. This difference occurs as screen color is created with light and printouts are created with ink, there's no way around this fact (see tip #3 for more details).
In this article, I've included five tips you can use to help your printouts look their beautiful best. Here's how to print a picture so it looks great!
Tip #1- Invest in a good printer
The internet today has a wonderful selection of printables for a wide variety of purposes. If you're planning on using a lot of printables, you'll save yourself a ton of frustration if you invest in a good, reliable printer.
Choosing between inkjet or laser...
I currently have a color laser printer and found the quality to be great.
My printer is a brother Brother MFC-9330CDW All-in-One Color Laser Printer

I like the fact that the ink doesn't smudge if it gets moist, plus laser printers don't have the problem of clogged inkjets. I use my printer for a variety of tasks from printing shipping labels to test printing my artwork. The downside is that laser printers and toner cartridges are generally more expensive. (Note, the art prints I sell in my store are done through a professional printer and are archival quality using acid-free inks and paper)
How printers work
Laser printers
Inside a laser printer is a laser beam that scans back and forth across a drum in order to build up a pattern of static electricity. This static electricity selectively attracts powdered ink called ‘toner’ that is transferred to the page. In a color laser printer, there is a separate toner for each color (CMYK) which are applied separately then heat 'fuse' to the paper.
Inkjet printers
Basically, an inkjet printer places extremely small droplets of ink onto the paper to create the image. These ink dots are so tiny that they’re nearly impossible to see with the naked eye. It should be noted that the various printer manufacturers use different methods for getting these dots onto the page.
Printer print heads and cartridges
I've had some great inkjet printers and some truly horrible ones. The quality can be uneven. With inkjets printers, it's all about the inkjet printhead. Some have the print-head as part of the printer and some come with the print-head as part of the replacement ink cartridge.
The advantage of having the print-head with the replacement ink cartridge is that if it gets clogged you can just replace the cartridge and you're good to go. These printers are generally cheaper, but the replacement cartridges are way more expensive.
If the print-head is included in the printer, then the printer is generally more expensive but the replacement ink cartridges are much cheaper. The problem with this type of printer is that if the inkjets become clogged you may not be able to get them unclogged in which case the printer will no longer be any good. I've had both types of inkjet printers...which is why I now use a laser printer lol.
Picking the right printer
Regardless of which printer you choose to print with at home, it's best to do a bit of research and read the reviews. It's also wise to make sure you check the price of replacement cartridges before purchasing the printer.
Be sure to know in advance the quality of prints you'd like to have in the end, as this will reflect how much you're willing to pay for a printer. If' you're a photographer and need better quality printouts, some of the more expensive printers that offer archival inks and accompanying acid-free paper would be suitable. For a person looking to just do some casual printing color fastness and longevity is probably not an issue, it's more about the price.
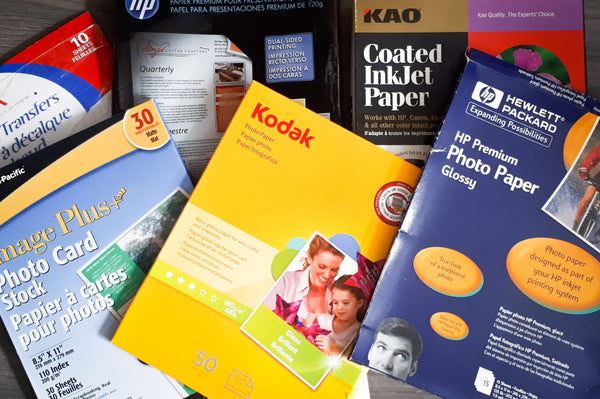
Tip #2 - Choose the right paper for the job
Paper can make a big difference. Be sure to buy the paper that suits your printer, i.e. inkjet paper for inkjets and laser paper for laser printers. Some printer manufacturers also have their own lines of paper (ex. HP, Epson, Canon ) If possible use the type of paper the manufacturer suggests for the type of printing you want to do.
Take note of the paper thickness and sheen (you'll also need this information for tip #3 printer settings) The end use of your printable will dictate which of these two variables to choose. For example, you'll want thicker paper with a satin sheen for something like a greeting card. A thinner paper with matte sheen (something you can write on) would be best for something like a calendar printable page. For photos, my preference would be thick paper with a glossy sheen.
For the sake of our wall art printables, you'll want to use the highest quality paper to get the best results.
Paper quality
The paper and ink quality you choose will also determine how long the page you've printed stays looking good. If the inks your printer uses aren't 'archival' and the paper isn't 'acid-free' whatever you print will tend to fade and color shift over time. As mentioned above in Tip #1 archival inks and acid-free papers tend to be quite expensive so you'll need to assess that, although if you decide to go with a cheaper printer and materials you can always reprint the artwork if it fades.
I've used many different types of papers, a great all-purpose glossy paper for laser printers is ...
HP Premium Presentation Glossy Laser Paper
Experiment with different types of paper to see which prints best for your particular printer. Multi-type paper packs are great for this
Canon Pro Paper Samples Pack 8657B012
Hahnemuhle FineArt Glossy Inkjet Paper Sample Pack
Tip #3 - Understand your printer's settings
Use the settings that best fit what you're printing. If you're printing something with just text or black outlines you can use a lower quality setting to print quickly and conserve ink.
If printing a full-color artwork to hang in your home, you'll want to use the 'highest quality' or 'photo' settings.

Color settings
You may also need to select a "color setting' which may involve choosing between RGB or CMYK. This starts to get pretty involved for the average person who's just trying to print something and have it look good.
CMYK color and RGB color
Basically what this means is that your image is going from screen colors RGB (Red, Green, Blue) to printed colors CMYK (Cyan, Magenta, Yellow, Black), which correspond to the colors of ink in your printer. Many printers will do the conversion automatically for you by using the assumption that your document/art is sRGB (note: the standard color profile for most documents online and downloadable printables is sRGB). Probably the easiest solution is to do a sample print using the one color profile and if it doesn't look good try the other one.

Paper sheen
The other variable you'll need to address is choosing the setting according to the paper sheen (glossy/satin/mat etc.) The paper package will usually indicate the sheen. If not you should be able to guess just from looking at the paper in good light.
Paper orientation
Be sure to adjust the setting to select the correct size/scale for the paper you are using and also select the proper paper orientation whether it's 'horizontal' or 'portrait'. Usually, there'll be a print preview setting on your printer where you can see what the layout of the final printout will look like. This way if you don't like what you see you can adjust it before doing the actual printing.
If you do choose to scale the image there are a few rules…check out tip #4 to see how to best scale your images.
Paper thickness
Another part of this whole paper equation is how your printer deals with the thickness of the paper you've chosen. Even though your particular printer may be able to print on thicker paper you may need to hand feed the paper one at a time via a by-pass slot (especially for card stock or envelopes). If you're using the feed tray, empty all the regular paper from the tray and place only a few pieces of your select paper in the tray while printing in order to avoid jamming. You may also have to adjust some settings on your printer to accept thicker types of paper. Depending on your printer this can either be a software setting or a manual setting on the actual printer.
- DO NOT load different types of paper in the paper tray at the same time because it may cause paper jams or feed problems.
- For proper printing, be sure to choose the same paper size in your software application as you have in the paper tray.
- Avoid touching the printed surface of the paper immediately after printing.
- Before you buy a lot of paper, test a small quantity to make sure that the paper is appropriate for the machine.
Tip #4 - Scaling to resize images
When you download a printable image it may not be the size you need. If this is the case the size will need to be adjusted.
But first, there are a few things you should know about changing the size of an image as it will affect the quality of the printout.
Understanding image resolution
Chances are the image you download is a jpg or pdf. Both of these file types are raster images, meaning they have a fixed size with a fixed resolution (unlike vector images which are can be scaled and are a whole different ball of wax). The resolution of a raster image is made up of little squares or ‘pixels’ (on screens) or ‘dots’ (when printing). Pixels and dots are counted in per square inch increments to express a concept called ‘resolution’. The higher the dpi (dots per inch) or ppi (pixels per inch), the better the resolution and the clearer and sharper the image will be.
Screen vs. print resolution
Note: screen resolution is 72 ppi and printing resolution is best done at 300 dpi. You'll notice that you don’t need as much resolution to show a sharp clear image on a screen as you do when printing on paper. Just so you don’t get too confused most people use dpi to refer to both pixels and dots.
When an image has a fixed resolution you can make it smaller and not lose quality but if you try to increase the size, the picture will become blurry as there's not enough pixels or image data to make up for the increased resolution.

Above are photos showing the results of scaling an image.
The apple on the right is the correct resolution so it looks clear and crisp on screen (500x500 at 72 dpi (dots per inch)).
When you scale an image smaller
I took the apple on the right and then saved it at a quarter of the file size (125x125 at 72dpi) this is the small apple in the middle.
The resolution of the inset small apple is the same as the apple to the right (72dpi) but the apple is only clear at a very small size (125x125pixels), as three-quarters of the image data or pixels (500x500 down to 125x125) has been thrown away in order to make it small.
When you scale an image larger
If I took that small apple and then made it big again (500x500) it will now have a resolution of 18 dpi (if my math is correct). The re-enlarged apple photo on the left looks very blurry because there are not enough pixels per inch to make the image clear. Making the picture bigger did not add any new picture data so the picture must be made with a fewer number of pixels.
How scaling effects image resolution
Think of pixels or dots as a grid of squares. Each square/dot/pixel can only be one color. If you have a few squares (low resolution) you can only make a small picture with no fine detail. If you have lots of squares (high resolution), you can have more variety of colors and shading and more fine details.
To go from a high resolution (lots of squares) to a lower resolution, some squares are lost. The colors are averaged between the remaining squares, losing some detail and maybe making the colors a little "muddy" as they are blended.
There are some tricks to making images larger than the original but that's beyond the scope of this article, and probably best left to professional graphic designers doing lots of tinkering using photoshop.
Using printer settings to scale smaller
To print a pdf in a smaller scale check out the video from Adobe below
Printing at a smaller scale can be accomplished by using the controls on your printer. If the image is larger than the printable area adjust by clicking "fit to paper" or by manually scaling by percentage to fit within the printable area.
Printing to the paper's edge
There are a few types of printers that have a 'borderless' print setting which means you can print right to the edges of the paper, but for all other printers, a blank border around the outside of the paper will remain. You can always use a paper trimmer to cut away the extra white border especially for something like a greeting card.
I have a mini paper trimmer that I use all the time. I find it's so much easier and quicker than using scissors. If you have an excess white paper to trim, the cuts made with a trimmer look much cleaner and leave a much straighter edge.
Fiskars 196920-1001 Portable Scrapbooking Trimmer, 12 Inch
Tip #5 - Take it to a professional printer
If you don't want to invest in a quality printer and your printing needs are few, or if this all seems like just too much hassle, you can just put your stuff on a USB thumb drive and go have them printed at your local service bureau like:
The quality will be great but it will also be a bit expensive if you have lots of stuff to print. Be sure to get a quote beforehand to avoid any surprises. It will usually cost extra to have your job printed quickly while you wait.
I’ve frequently gone the professional printing root. Usually, because my printer wasn’t working, or it was a large volume job, or the size of the printout I needed was too large for my printer. Pro shops have lots of options that are either unavailable or inconvenient for those printing at home.

You can also get printing done online through providers like:
I can't recommend one over the other, but it's still worth 'google-ing' for further choices. Of course, if purchasing online you'll have to wait for the printouts, so it's not something you'll have in hand today.
Copyright
Copyright may be an issue if taking it to a pro-printer. They’ll want to know that you have the legal right to print the image, especially with something like artwork. As an artist, I’m completely on board with that. Even if you're not getting them professionally printed you should still check that you have the legal right to print whatever it is that you're trying to print.
Conclusion
I’ve given lots of information to go with each of the 5 printing tips above. Hopefully, I’ve answered some questions that you may have been wondering about. Some of the concepts I discussed, especially around resolution are a little more in-depth than most folks need to know if just printing printables. But I think it’s better to know too much than not enough.
Be sure to sign up below to get a free printable to give your new found knowledge a whirl.